Datafox Terminal Configuration
Objective
The objective of this page is to show how to correctly set up the Datafox terminal, so it can communicate with your HR solution. This will ensure that the data captured via the physical terminal can be transferred to Hubdrive.
Prerequisites
- The Datafox Software Configuration has already been done
- You have downloaded Datafox Studio
- You are System Administrator
Click Through
- Connect the Datafox Terminal to your computer
- Open Datafox Studio
- Click on Configuration
- Select System variables for device communication
- Make sure your device is selected under Device type
- Click on Read from device
- Click on Yes
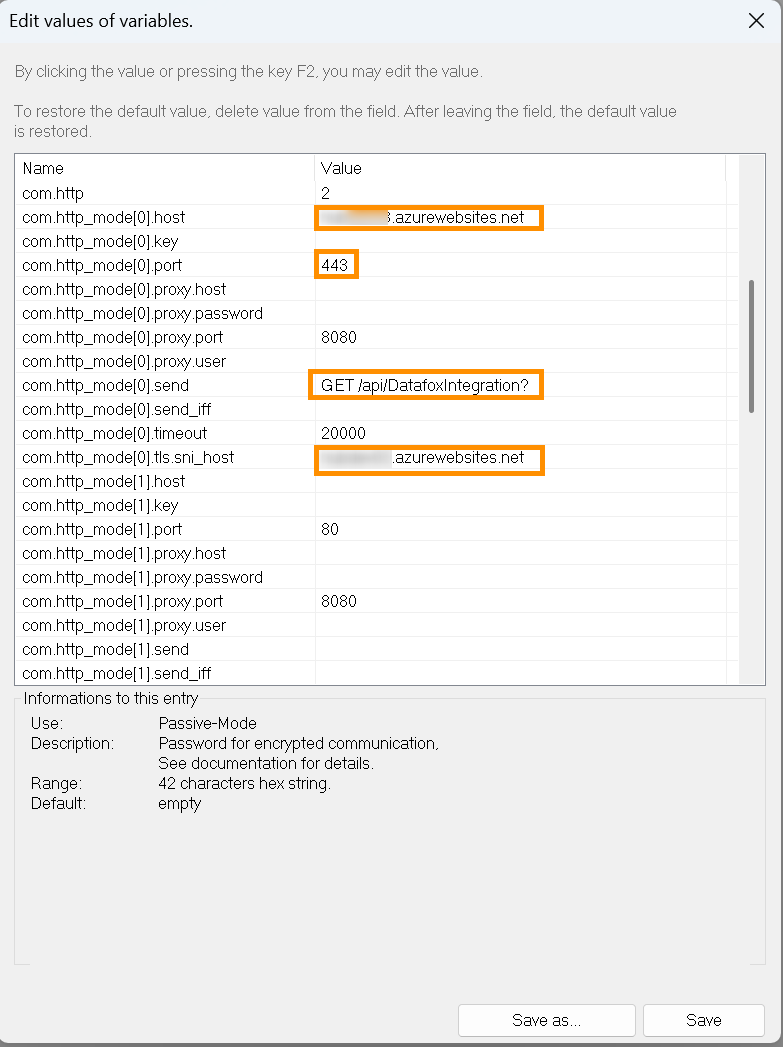
- Add the following values:
- com.http_mode[0].host = the URL from the azurewebsites.net
- Open your Function App in Microsoft Azure and under Overview, get the Default Domain
- com.http_mode[0].port = 443
- com.http_mode[0].send = GET /api/DatafoxIntegration?
- com.http_mode[0].tls.sni_host = the URL from the azurewebsites.net
- Open your Function App in Microsoft Azure and under Overview, get the Default Domain
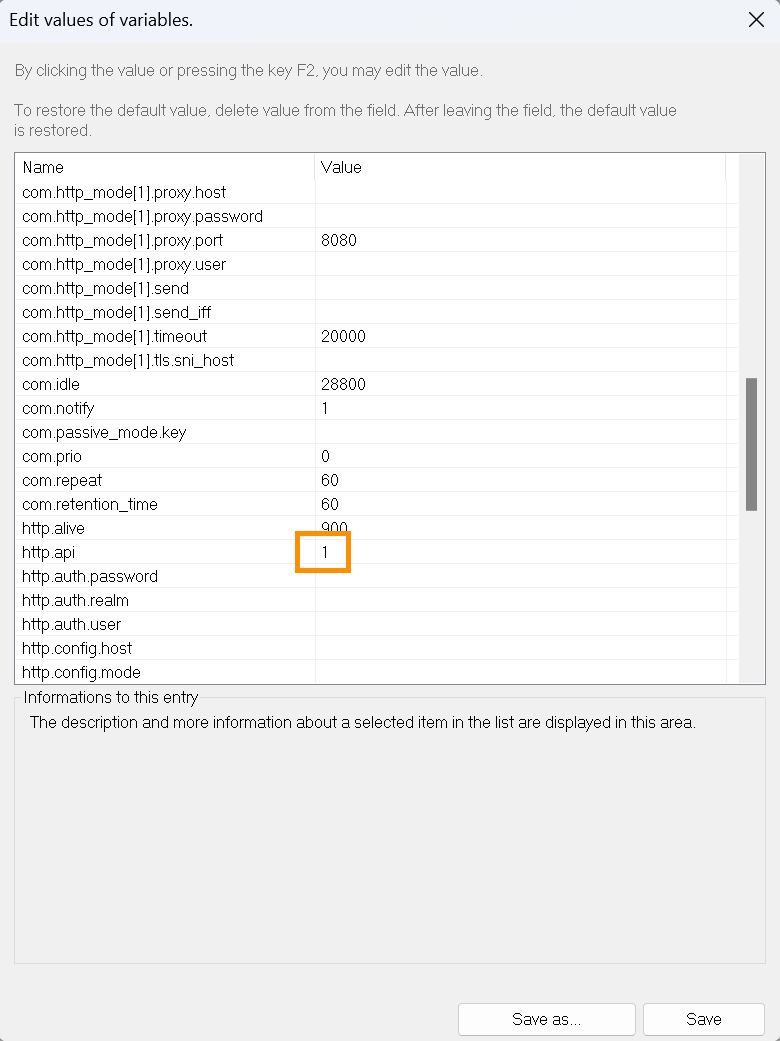
- http.api = 1
- com.http_mode[0].host = the URL from the azurewebsites.net
- Save
- Write to device
- Exit
Next Steps
- On your terminal, go to the System Bios by clicking ESC and Enter at the same time, then go to User Settings, and then click on Service. Here select Clocking any time possible, and set the option to ON. This will ensure that the data will always be transferred.
- For the terminal to communicate with the function app, you will need to import HTTPS certificates. Please use this tutorial next to complete your setup.

