This Tutorial shows you how you can add an option to filter the vacancies in the Recruiting Portal by Department.
Add "Filter by Departments" option
Objective
Prerequisites
- You are System Administrator
- A storage for your customizations has already been created
Click Through
Part 1: Create a view
- Start in PowerApps
- Click on Solutions
- Select the solution you use for your customizations
- Click on Add existing
- Select Table
- Search for the table Department
- Uncheck "Include table metadata"
- Click on Add
- Click on the arrow next to Tables in the left column
- Click on the arrow next to Department
- Click on Views
- Click on + New view in the top ribbon
- Give the view a name (this view will include only departments with open vacancies)
- Click on Create
- Click on Edit filters … in the column on the right
- Click on Add, then on Add row
- Select Vacancies, does not equal and enter 0
- Click on OK
- Save and publish in the top-right corner
Part 2: Configure the filter in your Recruiting Portal
- Go to HR HUB
- Click on HR HUB in the top ribbon
- For older Portals, select the Portal Management App; for newer Portals, select the Power Pages Management App
- Under Content, select Lists
- If you're in the Portal Management App, click on Vacancy List
- If you're in the Power Pages Management App, click on Vacancy List - Hubdrive
- Scroll down until you find the Section Metadata Filter
- Under Filters you'll find a Dynamic Lookup Set
- Set the Relationship field to Department
- Under View, select the view you just created that includes only the Departments with open vacancies
- Save & Close
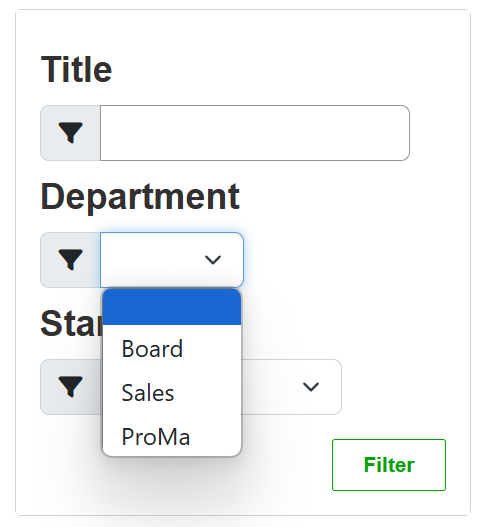
Result
After following all the steps, the filter for Departments will be added to your Recruiting Portal: