The aim of this tutorial is to show you how to add a Microsoft 365 group. A Microsoft 365 group facilitates collaboration between people. An e-mail address enables all group members to contact each other and an additional Sharepoint website can be used to publish information.
Add a Microsoft 365 group
Objective
Process
System Admin
Define the basics of the group
System Admin
Add owners and members
Prerequisites
- You are an administrator
Click Through
- Start in the Microsoft 365 Admin Center
- Under Teams and groups in the left menu, select Active teams and groups
- Click on Add a Microsoft 365 group
- Give the group a Name
- Add a Description for the group (optional)
- Click on Next
- Click on Assign owners
- In the next step, assign the users (up to 20) by clicking on the +-symbol
- You can search for users by name or email address using the magnifying glass icon
- Select Add
- Click on Next
- In the next step, add members
- You can search for members by name or email address using the magnifying glass icon
- Click on Add
- Click on Next
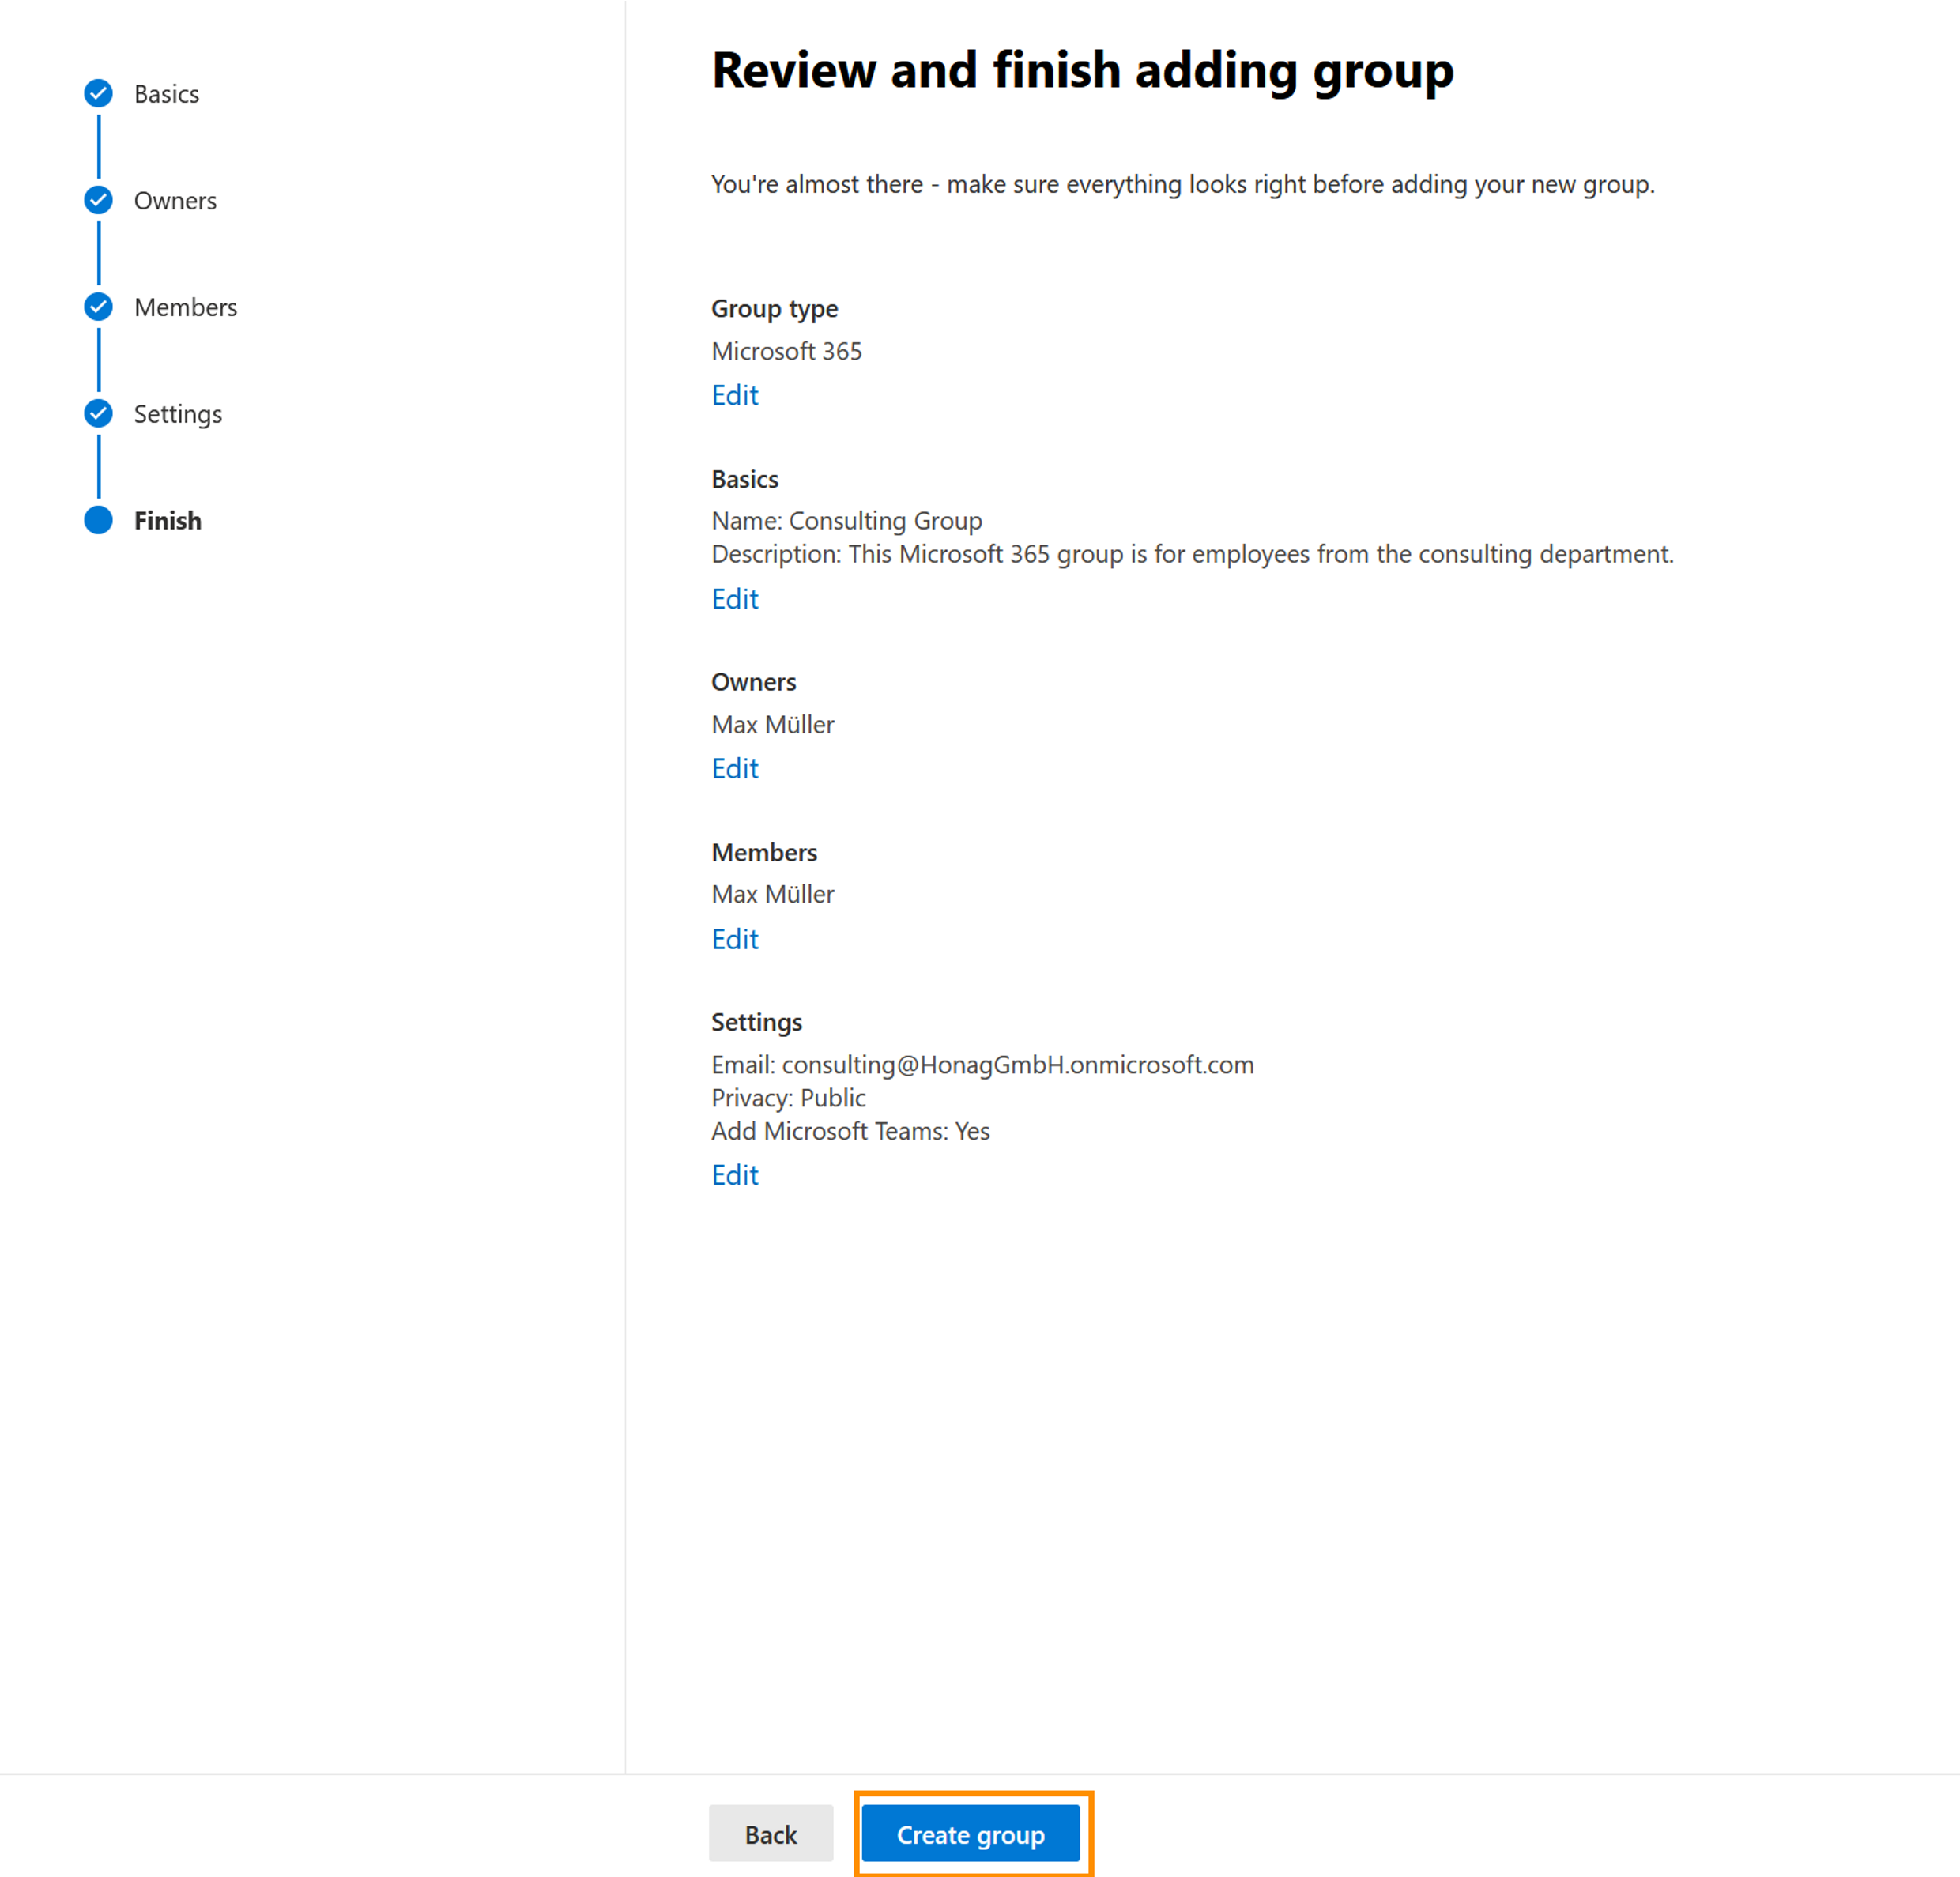
- Select the next step Settings
- Select a Group email address for the group
- Choose Privacy (Public or Private)
- Decide whether Microsoft Teams should be created for this group
- Click on Next
- Check the details and click on Create group
Hint
- Viva Engage groups must be created in Viva Engage, but can be managed in the Microsoft 365 Admin Center (Viva Engage and Microsoft 365 Groups | Microsoft Learn)
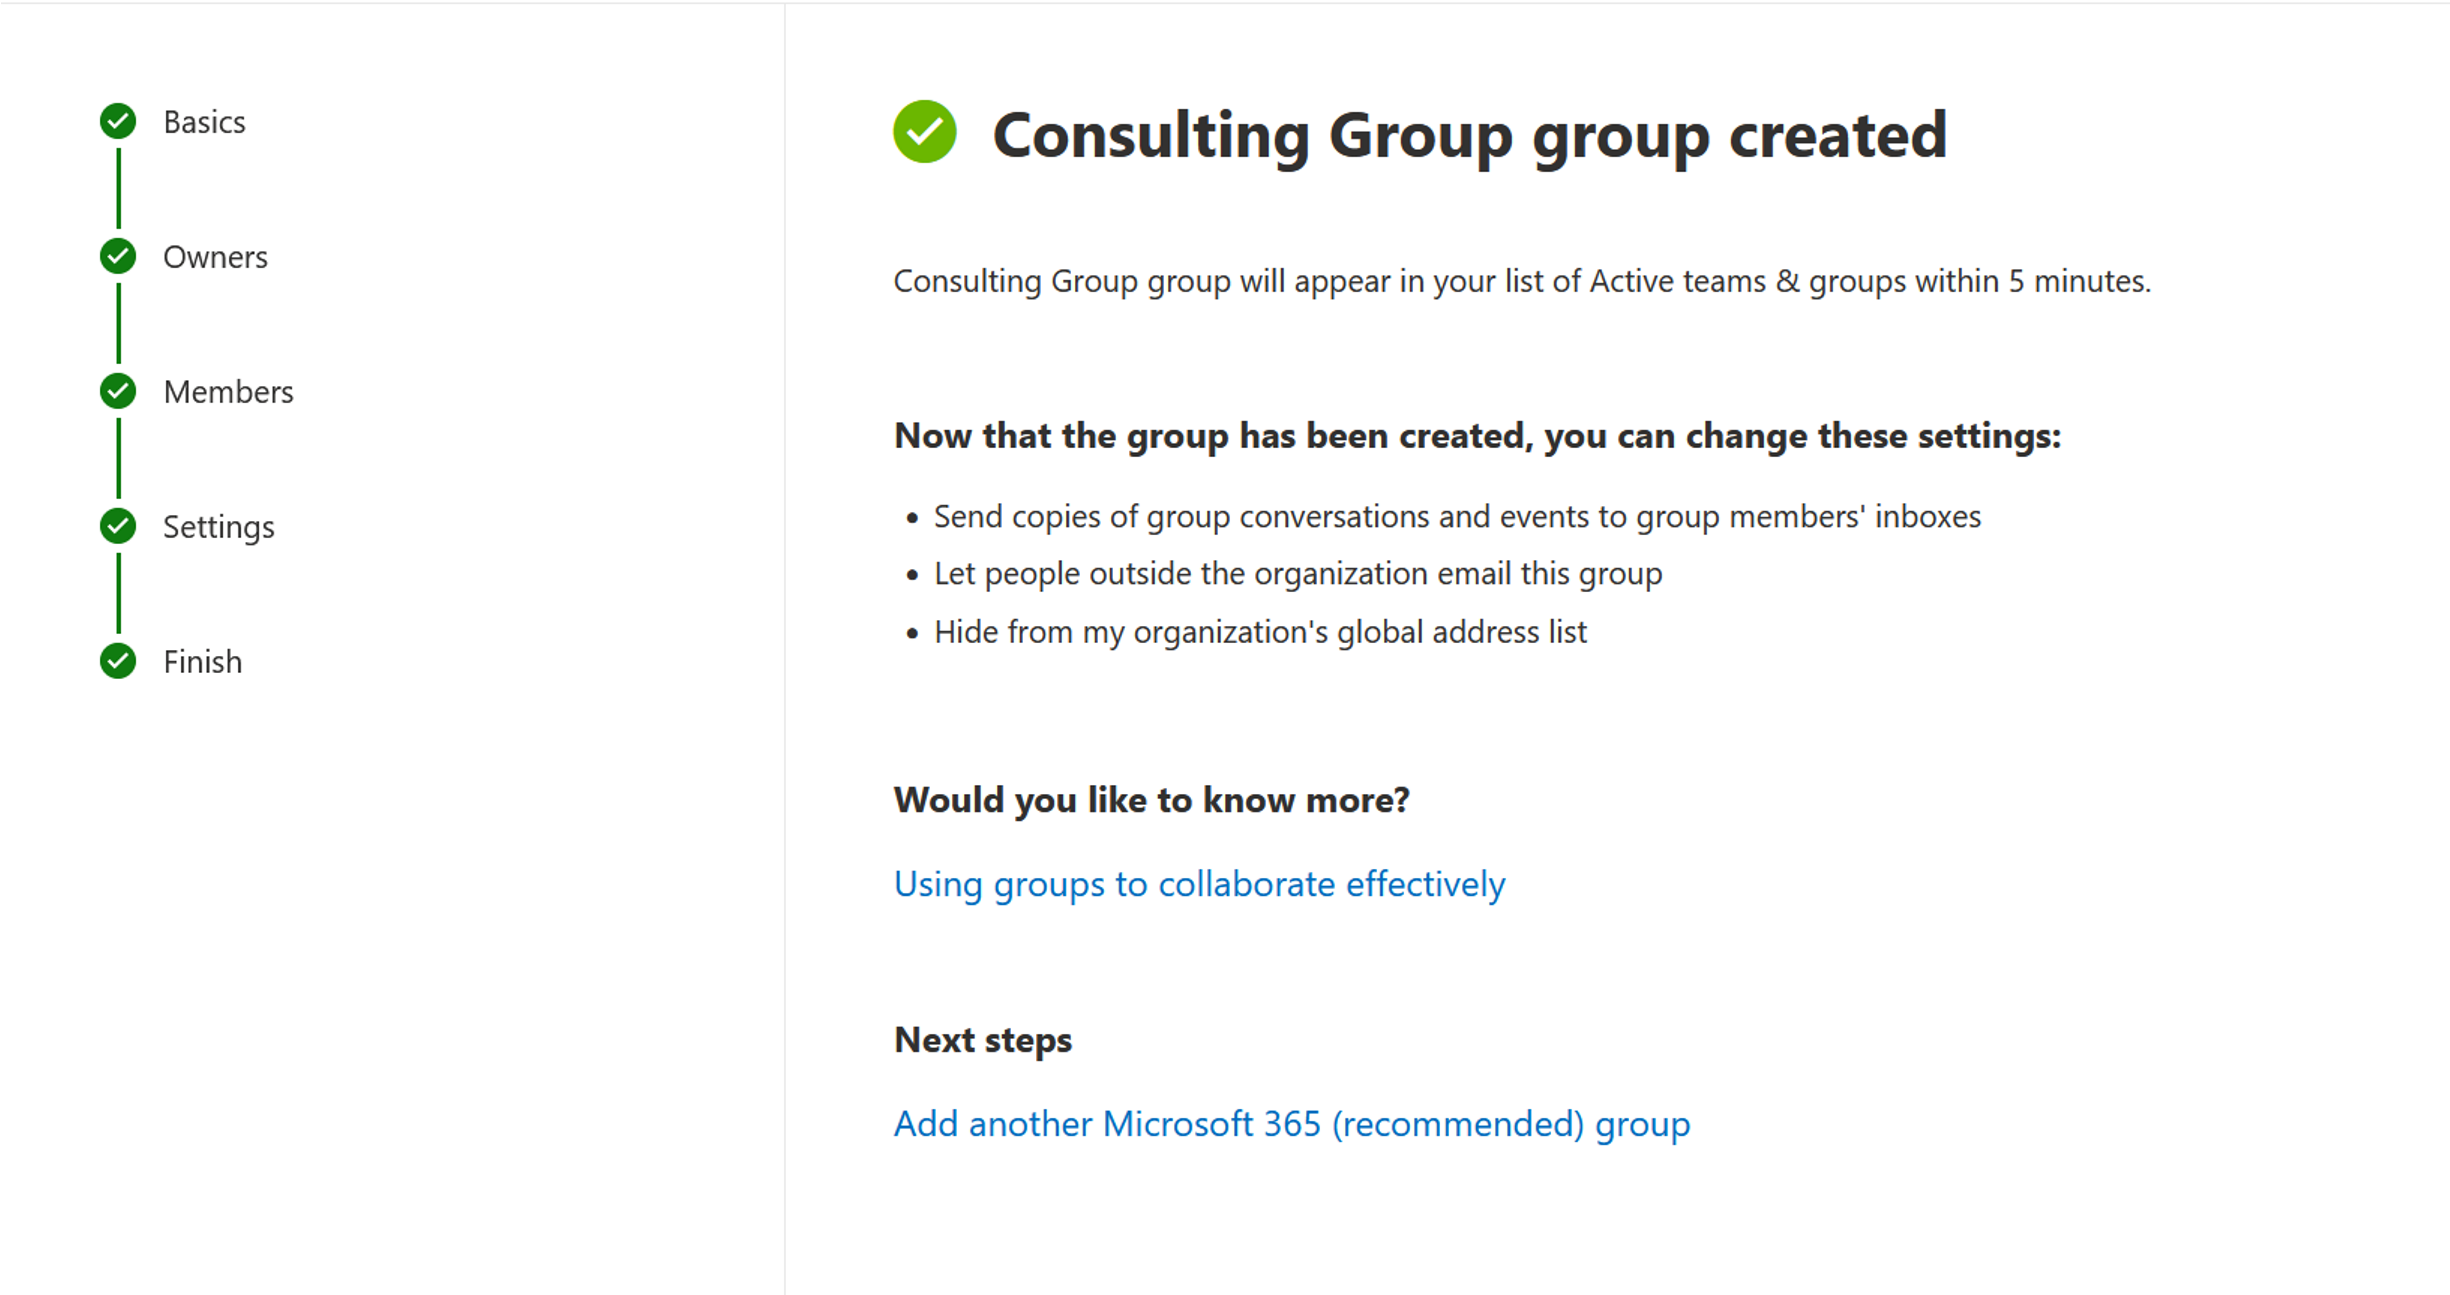
Result
On the screenshot you can see the final step of creating a Microsoft 365 group.
Next step
- After adding a Microsoft 365 group, add users to your tenant and assign licenses.