The objective of this page is to show how to upload the interface picture into your Datafox Terminal. Hubdrive provides out-of-the-box 2 option sets, being one with 4 buttons and the other with 6 buttons.
Datafox Terminal: Design configuration (optional)
Objective
Prerequisites
- The Datafox integration setup is already done
- You have downloaded Datafox Studio
- You have downloaded the Design Files from the Hubdrive Customer Portal
Click Through
- Connect the terminal to your computer
- Open Datafox Studio
- Click on Configuration
- Click on Display - Designer
- Select Open design
- Select the file that you have previously downloaded
- Select the template EVO_4.6_flexkey (The EVO_4.6_flexkey was renamed to EVO 7.0 Flex)
- Select the template with 4 or 6 buttons (file ends in .ini)
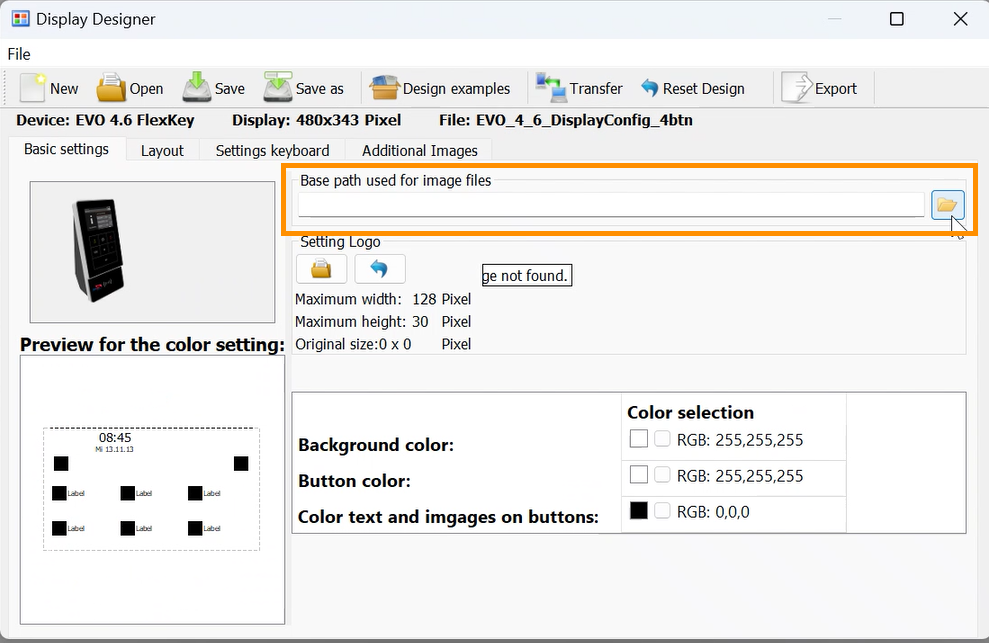
- Click on the folder icon, under Base path for image files
- Select the same folder, and the path gets filled
- Now click on the last tab Additional Images
- Scroll until Image for the key area
- Click on the folder icon
- Assign the image for 4 or 6 buttons
- Add the touch configuration
- Click on the folder
- Add the file .dfk for the image with 4 or 6 buttons
- Save via top-ribbon
- Click on Transfer
- From the dropdown menu, select your terminal
- Click on Perform
- Wait until the process is done, then you can close everything
Hint
- You can use the same tutorial to change the layout at any time. This can be helpful you want to change from 4 buttons to 6 as an example.
Result